Showing posts with label Acetate. Show all posts

Monday, 9 November 2009

It's a Crafters companion sketch 10

Morning all can't believe how fast the weeks are going were on to sketch 10 already over at It's a Crafters companion challenge blog This weeks sketch is by Rachel + there's a recipe to follow use the colours White, Red & Gold
some ribbon, gems and some Embossing it can be either.

why not pop over and have a go also see what the other DT members have come up with.
here's my card i've turned the sketch on it's side first i stamped & heat embossed the Crafters companion Christmas flower fairy stamp with gold embossing powder then coloured her using copics & Iridescent H2os for the wings then using the cuttlebug christmas tree embossing folder i embossed a piece of white & a piece of gold card and cut them out using the gold as a mat i attached a piece of Acetate to the back of the fairy at one end and the other to the back of the tree before attaching to the card so the fairy is floating in front of the tree.
Thanks for stopping by

Monday, 15 June 2009

Finally got one done


Hi all hope everyones well must get round to doing some blog hopping been really lapse on visiting your blogs don't know where the weeks are going didn't seem that long since my last post my hubby has been asking for a month for me to make this card for one of his workmates had to get a hold of his identity card from work with out him getting suspicious so i could scan the photo i've just got round to doing it the night before his birthday just seems so much of an effort been so much going on in the family lately that when i do get a bit time to myself my mind seems to be some where else right back to the card was made in publisher and printed onto photo paper the back and inside where printed seperately enabling me to make the pocket using acetate so the full pass is on show usually i'd laminate the pass to make it a bit sturdier but can i find the laminating pouches don't have to make the next one til september so they should of shown up by then.
Thanks for stopping by
Wednesday, 17 December 2008

Grandson's Christmas card a Ben 10 one

Hi all just popped on with my Grandson's Christmas card found the Ben 10 image on the net took it through 3dcd2 to Decoupage it and make the backing sheet i used gold mirricard for matting with border peeloffs to neaten the edges i used Heat resistant acetate to emboss the greeting on using an embossing pen and gold embossing powder then matting it onto some green card i used a Santa key for embellishment i attached it to the card by using an eyelet and threading a thin piece of acetate through the ribbon then slotting it through the eyelet and taping it to the inside of the card i've told my daughter she can snip the acetate with some scissors to remove it from the card.
Thanks for stopping by


Sunday, 14 December 2008

Bit of a start should i be panicking

Hi all have got quite a few cards still to do like extracting teeth at the minute just can't get in the mood after playing about with a backing sheet on pc finally got some colours i liked so printed them out onto Acetate and attached to the card with DST two more posted below this post the images are from a roll of wrapping paper just a pity theres just the two designs on the roll i cut them out and attached them to some gold card cut out using my cricut the cards are near enough the same just arranged differently with gold ribbon and bows two have greeting tags on one i used the greeting from the wrapping paper matted onto gold card well best get on gonna be a long night
thanks for stopping by


Friday, 28 November 2008

Happy Birthday Emma

Hi it's my eldest daughters birthday today have had a time trying to think of what to use on her card eventually finished it boy what a palava i've had trying to get a pic i used black glittercard with some foiled acetate attached with some gem brads the image is a Dufex fairy decoupage which was attached to a piece of silver mirricard which had been embossed with one of the cuttlebug embossing folders i used some peel off borders to neaten the edges Emma was cut out on silver mirricard using a cuttlekids alpha die set i added a butterfly for embelishment i am now fit to drop so gonna catch some zzzzzzzzzzzz 's before she comes over
thanks for stopping by

Sunday, 9 November 2008

Wendy's Inspirational challenge 3

Hi heres a card made for Wendy's challenge we had to take inspiration from the photo she posted i had just bought a set of Inkadinkidoo fairy stamps so decided to use one. The image i stamped onto white card and coloured in with water pencils and Sakura pens i printed a feather background onto acetate which i attached to the card using brads i cut a scalloped oval plus a plain oval using robo the larger oval i stamped a pattern round using pink ink then put it through the cuttlebug using the swiss dots folder the smaller oval i used a flower embossing folder to emboss it then attached a piece of the leftover printed acetate to it using a brad you can just make out the embossed flower behind the acetate the fairy is attached with silicone glue the word friends is a brad i also added a strip of lace with a piece of ribbon over it

Thanks for stopping by

Wednesday, 29 October 2008

Quick Anniversary card for my Hubby

Hi just made this anniversary card for my hubby been married 22 yrs tomorrow doesn't seem that long bit of a rush job trying to get card done with him being in other room the background is off the Crafters Companions occasions Autumn cd i tweaked the colour with the colouriser before printing on acetate hey no glare off flash either rather pleased with the colour i cut a strip of brown card and embossed it using the swiss dots folder then attached to the white card then added the acetate using two leaf brads and a small piece of double sided tape the image i'd already stamped and heat embossed with gold embossing powder i then coloured it in using water pencils and matted it onto some gold mirricard the stamps another mini set from inkidinkidoo not to keen on the blue as the background wish i'd done the paper before the topper
Thanks for stopping by

Tuesday, 3 June 2008

Trying a Negative Effect


Hi i've used this image which i used for my blog header loved the effect it gave when the colours were inverted so thought i'd try it on a card i took it into a graphics programme to put the background pattern behind it and printed it onto printable acetate to use as a wrap when printing on transparency you cant use the borderless setting which worked ok as its given it a silver border round the card i used two gem brads to attach it to the base card and added different coloured gems to the centre of the flowers the base card is silver Mirricard its took longer to try and get a descent photo than what it did to make the card
thanks for stopping by

Monday, 11 February 2008

back to shadows cd

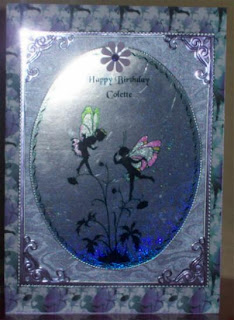
Hi i had to do a card for a friend on the cc forum dont know how many attempts i tried to get a proper photo of this but the glitter effect card in the background wasnt having it managed 2 views but still not the colour its supposed to be the image and background paper are from the dancing with shadows cd printed onto acetate the wings were coloured with Sakura stardust pens even printed the greeting out for a change and then attached to a piece of dufex card with some glue dots at the back of the fairies and a brad fastened through to secure it which was then stuck to a piece of satin effect paper which was matted on to a piece of purple mirricard the corners are from a cuttlebug die

Friday, 25 January 2008

Romance board not for Valentines yet

hi ive Just finished making this card for a friend who will be 50 next month using the glitter Girls Romance board using some pearlescent card gold embossed paper some gold card acetate and some peel offs the large butterfly was adhered with silicone glue and a champagne glass charm was attached with a pearl brad hope she likes it just debating wether to add some gems to the acetate hmm oh and my new board came today so hopefully can do something with it thanks for popping by

Thursday, 15 November 2007

Mr & Mrs Snowman


Hi all think i might slowly be getting into christmas cards emphasize slowly

heres a one i made today i got the Image from hobby-tool and the background printed on the Acetate is from the Imag-e-nation web site the card is basically matted and layered the mirricard was put through the cuttlebug with the snowflake embossing folder a few brads for embellishments and highlighted with Sakura stardust pens and some clear crystal glitter i havent put a greeting on at moment as still undecided who its for right must get the pies out of the oven thanks for stopping by

Tuesday, 13 November 2007

Snowman card


hi all anybody else get stuck on thinking up a title or is it just me just finished making another christmas card using acetate as before same design but in a different colour the topper is a decoupage snowman (from hobby-tool) mounted on some white glitter card which was matted and layered on silver mirricard the dad is spelt with brads (bit wonky) still think its missing something maybe some cord or ribbon but still got time too go back to it
the Merry christmas is a clear foiled sticker found them in woolworths quite like them actually. also used Sakura pens just too highlight some parts of the snowman and some glitter well thats it for now can go get something too eat now im starving thanks for dropping by

Monday, 12 November 2007

xmas card


hi all finally managed too make a start on christmas cards well here it is only the one so far and its took a while to get round too this one just cant get into the festive mood at this rate wont have them done for next christmas
I took one piece of lilac A4 pearlescent card scored and folded in half printed the snowflake design from crafters companion vintage christmas cd onto acetate and attached too front of card with two eyelets made a bow and threaded through
the topper was made using eyelets and ribbon with some stringed beads to act as garlands with a star brad at top and then i cut a piece of dufex into the shape of planter and stuck on with a foam pad the ribbon was secured with some dst then layered onto some silver mirricard and finished off with peel offs
Blog Widget by LinkWithin